Roof Maintenance Checklist: What Jupiter Homeowners and Property Managers Need to Know
.svg)


.avif)
Preventable roof leaks, rot, and premature roof replacements in Jupiter usually start with small issues that go unnoticed—clogged gutters, loose flashing, cracked shingles, or creeping moss. For homeowners and property managers, a straightforward, seasonal maintenance plan can extend roof life, protect interiors, and keep budgets predictable. This practical checklist shows you what to look for, how often to inspect, and which tasks are safe to handle yourself.
In the article ahead, you’ll get a season-by-season inspection cadence, step-by-step gutter cleaning guidance, how to check shingles, tiles, and flashings, tips for safe moss and algae removal, ways to spot early leak indicators from the attic to the eaves, essential safety gear for DIY checks, clear signals it’s time to call a pro, and realistic cost ranges for routine roof maintenance and minor roof repairs.
At Talbot Companies, we focus on reliable results and lasting value. Use this checklist to prevent surprises, schedule smart, and make informed decisions about what to maintain now—and what to leave to a qualified roofing contractor.
Seasonal Roof Maintenance at a Glance
Staying ahead of small issues by season keeps repairs affordable and extends roof life. Use this quick plan for routine checks and light maintenance; escalate anything unsafe or complex to a licensed roofer.
Quick safety note:
- Work from the ground or a stable ladder whenever possible; avoid walking the roof.
- Use non-slip footwear, gloves, eye protection, and fall protection on steep or elevated surfaces.
- Do not pressure wash roofs; it can force water under shingles and strip protective granules.
Spring (post-winter recovery):
- Walk the property and scan slopes, ridges, and valleys with binoculars for missing, lifted, or cracked shingles/tiles.
- Check flashings at chimneys, skylights, walls, and vents for gaps, rust, or loose sealant.
- Clear gutters and downspouts; flush with a hose and confirm water discharges 5–10 feet from the foundation.
- Remove small moss or algae with a soft-wash cleaner approved for your roof material.
- Inspect the attic on a sunny day for daylight at penetrations, damp insulation, or musty odors.
- Document findings with photos and note storm-related damage for potential insurance conversations.
Summer (heat and storm readiness):
- Trim back branches 6–10 feet from the roof and remove debris from valleys and around rooftop equipment.
- Recheck gutters before storm season; add gutter guards if clogs are frequent.
- Examine sealant at nail heads, vents, and counterflashing; re-seal small cracks with roofing-grade sealant.
- Look for blistered, curled, or brittle shingles caused by heat or UV exposure.
- Confirm attic ventilation and insulation are adequate to reduce heat load and shingle aging.
- After severe weather, do a ground-level inspection for fresh granules, dents, or displaced materials.
Fall (leaf and moisture control):
- Thoroughly clean gutters and downspouts; ensure hangers are tight and slopes allow free flow.
- Remove leaves, pine needles, and organic debris that trap moisture on the roof surface.
- Treat early moss or algae growth; schedule professional remediation for heavy coverage.
- Inspect flashing, drip edge, and ridge caps; replace loose fasteners and deteriorated sealant.
- Check for nail pops, cracked tiles, or loose panels and fasten or replace as needed.
- Test for leaks before winter by running a hose on lower, then upper sections while someone checks the attic.
Winter (protect and monitor):
- Keep gutters clear to prevent ice dams in cold climates; use roof-safe de-icing products where appropriate.
- From the ground, watch for sagging, new stains on ceilings, or drips after rain or snow melt.
- Avoid walking on wet, icy, or frosted roofs; postpone non-urgent work until safe conditions.
- Check interior humidity; excessive condensation can mimic roof leaks and damage sheathing.
- Schedule a professional inspection if you observe persistent leaks, widespread granule loss, or storm damage.
Safety Essentials: Tools, PPE, and Access Setup
Before climbing a ladder or stepping on a roof, set up safe access and the right gear. This keeps homeowners and property managers protected while reducing the risk of damage to shingles, tiles, and flashings.
Required PPE:
- Non-slip, soft-soled boots for traction
- Helmet or hard hat to protect from falls and debris
- Safety glasses and cut-resistant gloves
- Fall protection: full-body harness, lanyard, and rated anchor (for slopes or edges)
- Knee pads for shingle/metal work and attic inspections
Access & Ladder Checklist:
- Set ladder at a 4:1 angle; extend 3 feet above the gutter or roof edge
- Use a stabilizer to avoid crushing gutters and improve grip
- Tie off the ladder and have a spotter if possible
- Keep the base on level, firm ground; avoid doors and traffic paths
- Establish a clear drop zone; remove obstacles and pets
Weather and Work Area Rules:
- Postpone work during high wind, rain, frost, or when the roof is wet
- Avoid stepping on brittle or hot shingles; work mornings for cooler surfaces
- Watch for skylights, loose debris, power lines, and fragile tiles
- Use roof jacks and planks on steep slopes; never overreach
Basic Tools to Have Ready:
- Binoculars for ground-level inspections
- Garden hose for controlled leak testing (never pressure wash shingles)
- Soft-bristle brush or broom for debris and moss
- Plastic putty knife, caulk gun, roofing sealant, and compatible flashing cement
- Utility knife, measuring tape, and spare shingles/tiles for minor spot fixes
- Buckets, tarps, and a magnet sweeper for nails and fasteners
DIY vs. Pro: Know Your Limits
- Call a pro for slopes steeper than 6:12, 2+ story access, or complex roofs
- Leave brittle tile, slate, and metal seam repairs to licensed contractors
- Hire specialists for extensive moss, structural soft spots, or active leaks
- Consider professional soft washing for safe moss and algae removal
Inspection and Cleaning Checklist You Can Repeat Every Season
How often: Complete this checklist at least twice a year (spring and fall) and after any severe storm. In high-wind or tree-heavy areas, a quick monthly visual scan from the ground helps catch problems early.
Gutters and Downspouts: Keep Water Moving
- Clear leaves, twigs, and roof grit from gutters; flush with a hose until water runs clean.
- Confirm downspouts discharge 4–6 feet away from the foundation; add extensions if needed.
- Check for sagging runs, loose hangers, and separated seams; resecure or reseal as needed.
- Look for rust, peeling paint, or pinholes indicating corrosion.
- Clean roof valleys so water and debris don’t back up under shingles.
Typical costs: Professional gutter cleaning often ranges $100–$300 for single-story homes and $200–$500 for multi-story. Minor seam resealing or hanger replacement can add $50–$200.
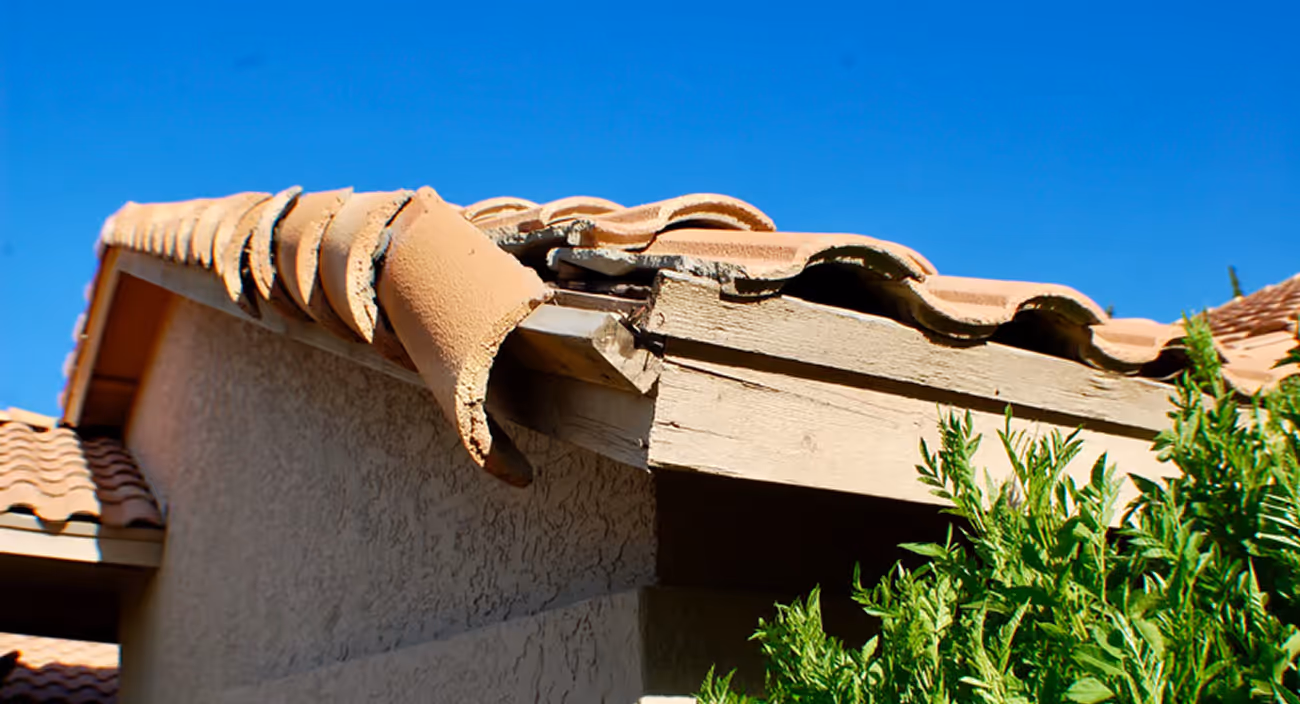
Shingles, Tiles, and Flashings: Find Wear Early
- Scan for curled, cracked, or missing shingles; look for exposed nails and lifted edges.
- Check granule loss in gutters and at downspout outlets (excess means aging shingles).
- Inspect metal flashings at chimneys, skylights, and sidewalls for cracks, gaps, or corrosion.
- Examine sealants around penetrations (vents, pipe boots) and reseal if dried or split.
- For metal roofs, look for loose fasteners and compromised seams; for tile, note slipped or broken tiles.
Minor repair costs: Spot shingle repairs commonly run $150–$400. Resealing or replacing small flashing sections typically ranges $200–$600. New pipe boots often cost $150–$350 each.
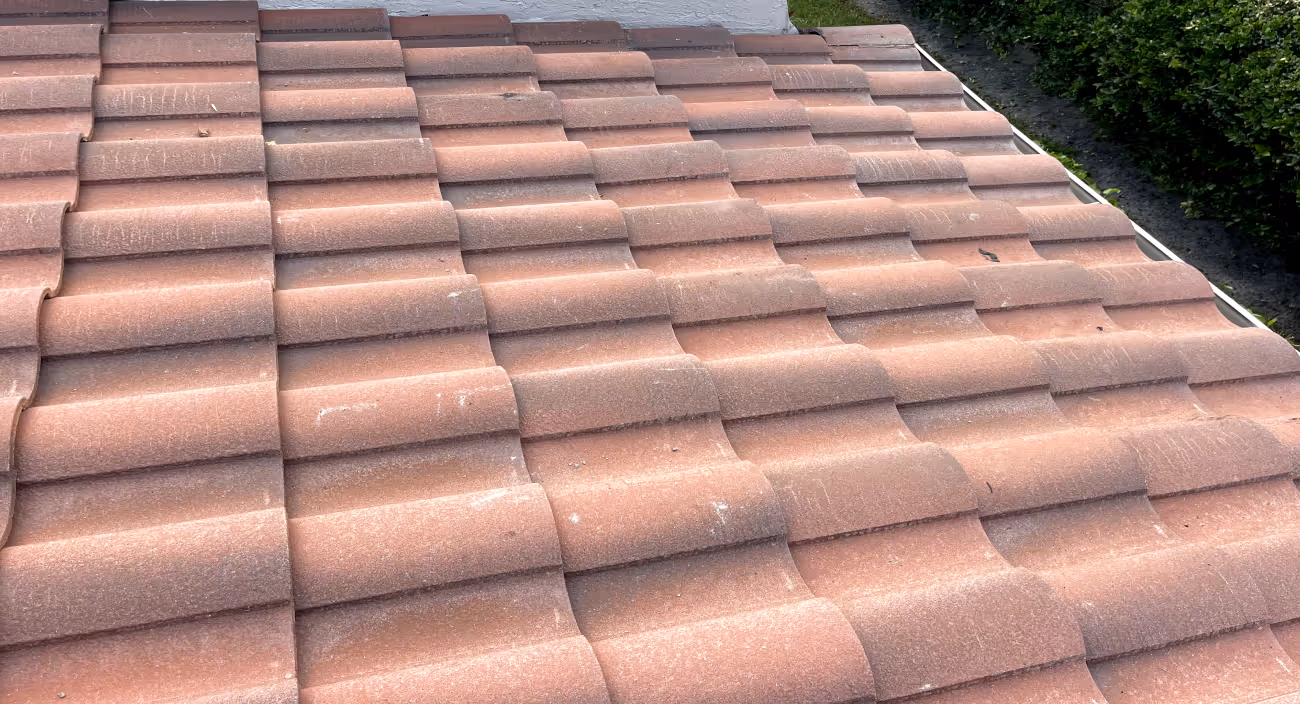
Moss, Algae, and Debris: Remove Safely
- Dry-brush moss to loosen; apply a manufacturer-approved moss/algae cleaner—avoid pressure washing.
- Trim back branches 6–10 feet to reduce shade and debris accumulation.
- Consider zinc or copper strips near the ridge to discourage regrowth.
- Keep rooftop debris off valleys, behind chimneys, and around skylights.
Service ranges: DIY cleaner solutions can be $20–$50. Professional soft washing often costs $250–$600, with debris-only rake/clean visits in the $150–$350 range.
Leak Spotting: Inside and Out
- During or after rain, check attic/upper ceilings for damp insulation, dark stains, or musty odors.
- Look for daylight through the roof deck at ridge, valleys, or around penetrations.
- Inspect interior ceilings for bubbles, peeling paint, or new hairline cracks.
- Walk the exterior perimeter for fascia/soffit staining and water trails on siding.
If you see moisture: Protect contents, place a container, and document with photos. Call a pro within 24–48 hours to prevent mold and structural damage.
After Storms: Quick-Scan Protocol
- From the ground with binoculars, look for missing shingles/tiles, lifted ridges, or creased shingles.
- Check for impact marks on metal vents, gutters, and flashing (possible hail indicators).
- Note tree limbs on the roof, displaced ridge caps, and torn or missing sealant at penetrations.
- Inspect the attic for fresh drips and wet spots immediately after the storm.
Emergency measures: Temporary tarping typically runs $300–$900 depending on size and height; insurance may reimburse after a covered claim.
When to Call a Professional
- Steep, multi-story, or complex roofs where safe access is limited.
- Active leaks, ceiling staining, sagging decking, or soft spots underfoot.
- Widespread granule loss, numerous missing shingles, or systemic flashing failure.
- Storm damage with debris impact, lifted sections, or exposed underlayment.
Inspection options: Many contractors provide free visual assessments; detailed photo reports or maintenance tune-ups often cost $150–$350. Annual maintenance plans commonly range $150–$500 per visit and include cleaning, sealing, and minor adjustments.
DIY or Hire a Pro? Tasks, Red Flags, and Realistic Costs
Use this guidance to keep maintenance safe, effective, and cost-conscious. Handle low-risk upkeep yourself; bring in a licensed roofer for anything that affects waterproofing, structure, or requires roof-time on steep or multi-story homes.
What you can do yourself
- Ground-level visual checks after storms (shingles, flashing, gutters, downspouts, soffits).
- Gutter and downspout cleaning with proper ladder setup and a helper.
- Debris removal from valleys and eaves using a roof rake or soft brush; avoid pressure washing.
- Apply manufacturer-approved moss/algae cleaner; rinse gently and protect landscaping.
- Trim small overhanging branches that drop debris and shade the roof.
- Document conditions with dated photos to track changes season to season.
Call a professional when you see
- Active leaks, water stains, or musty odors in ceilings, walls, or attic.
- Missing, curled, or broken shingles; granule loss exposing bald areas.
- Damaged or separated flashing at chimneys, skylights, walls, or pipe boots.
- Soft, spongy decking, sagging ridges, or signs of structural movement.
- Ponding water on low-slope sections or blisters in membranes.
- Large moss mats, thick lichen, or repeated algae blooms.
- Storm impacts: wind uplift, hail bruising, fallen limbs, or flying debris punctures.
- Ventilation issues: ice dams, excessive attic heat, or rusted fasteners/condensation.
Typical maintenance and repair costs
Actual pricing depends on roof type, pitch, stories, access, material, and local labor rates. Use these ranges to budget and compare quotes.
- Gutter cleaning: $150–$350 per visit (or $1–$3 per linear foot).
- Roof inspection: $150–$400; often credited toward repairs when work proceeds.
- Moss/algae treatment and soft wash: $0.20–$0.50 per sq. ft. ($300–$900 typical home).
- Replace 3–10 asphalt shingles: $250–$600.
- Pipe boot replacement or re-flash a single penetration: $200–$650 each.
- Chimney flashing repair or re-flash: $500–$1,500.
- Leak diagnosis and localized repair: $350–$1,200+ depending on cause and access.
- Flat roof patch (TPO/EPDM/modified bitumen): $300–$900.
- Skylight re-seal/replacement: re-seal $250–$600; replacement $900–$2,200+.
- Gutter guard installation: $6–$12 per linear foot installed.
Get better quotes and outcomes
- Share clear photos, roof type/age, pitch, stories, and gutter footage in your request.
- Note exact leak locations and when they occur (rain intensity, wind direction, time).
- Ask for an itemized scope, materials to be used, warranty terms, and cleanup details.
- Confirm the contractor is licensed and insured and follows fall-protection standards.
- For multifamily or portfolios, request a seasonal maintenance plan to reduce emergency calls.
Talbot Companies can help you prioritize repairs and set up a roof maintenance plan—partnering for reliable results and lasting value.
What Maintenance Really Costs: DIY Supplies and Professional Services
Solid budgeting turns roof care from a surprise expense into a predictable line item. Below are practical cost ranges for the most common upkeep tasks so homeowners and property managers can plan, compare quotes, and choose when DIY makes sense—and when a pro is the better value.
Typical DIY spend (per season):
- Safety and access gear: gloves, safety glasses, non-slip footwear, and a roof-ready ladder stabilizer typically run $70–$200 total (one-time buys you’ll reuse).
- Cleaning tools and supplies: gutter scoop, hose nozzles, and contractor bags are $15–$40; biodegradable moss/algae cleaner and a pump sprayer are $25$60 per application.
- Minor repair materials: roofing cement or sealant $8–$20 per tube, replacement shingles $30–$45 per bundle, roofing nails $5–$10, and replacement vent boots or pipe collars $10–$30 each.
- Preventive growth control: zinc or copper strips at ridge lines are usually $2–$6 per linear foot.
What pros charge in most markets:
- Gutter cleaning: $150–$350 for a typical single-family home; multi-building portfolios often price $1.00–$2.50 per linear foot, with surcharges for three stories and heavy debris.
- Roof inspection: $150–$300 for standard visual; $250–$500 with drone or thermal moisture scanning.
- Minor shingle repairs: $200–$600 for replacing loose, cracked, or missing shingles and sealing nail pops.
- Flashing reseal or replacement: $250–$750 per penetration (vents, skylights, chimneys) depending on access and material.
- Leak diagnostics and spot repair: $350–$1,000+ based on complexity and interior protection needs.
- Moss/algae treatment or soft washing (where appropriate): $300–$800 depending on size, pitch, and surface condition.
- Flat roof patches (mod bit, EPDM, TPO): $300–$900 for small membrane repairs.
- Maintenance plans: $250–$750 per year for a single-family home with biannual inspections and gutter service; $0.03–$0.10 per square foot annually for larger properties or multi-building portfolios.
What makes the price move:
- Steeper slopes, greater height, and limited access increase time and safety setup.
- Complex rooflines, multiple penetrations, and fragile materials (clay, slate) add protection and labor.
- Regional labor rates, emergency scheduling, and the extent of hidden damage also shift pricing.
- For communities or portfolios, economies of scale can lower per-building costs when services are bundled.
Money-saving moves that keep roofs healthy:
- Combine gutter cleaning with seasonal inspections to reduce trip charges; trim overhanging branches to cut debris and moss growth
- Document roof conditions with dated photos each season
- Tackle small issues (loose shingles, cracked sealant) immediately
- Install reliable guards where gutters clog repeatedly
- Schedule non-urgent work in the contractor’s off-peak periods
- Consider annual maintenance agreements for predictable pricing and priority service
When hiring a pro is cheaper than DIY (in the long run):
- Roofs steeper than 6:12, two or more stories
- Fragile tile or slate
- Areas near power lines or solar arrays, or leaks requiring diagnostic testing are best left to licensed pros.
- Professional work protects warranties, reduces safety risk, and often resolves issues faster—preventing interior damage that quickly dwarfs DIY savings.
What every written estimate should include:
- A clear scope (linear feet of gutters
- Number of penetrations
- Square footage of treatment
- Materials and brand specifics
- Access and safety setup
- Surface protection plan
- Before/after photos
- Workmanship and material warranty terms
- Cleanup and disposal
- Start/finish window
Component Hot Spots to Check Every Visit
Small issues often start at predictable locations. Use this focused checklist to scan high-risk areas quickly. Start from the ground with binoculars; only access the roof if it’s safe and the surface allows foot traffic.
1. Gutters and Downspouts: Remove leaves and shingle grit, check loose hangers, reseal leaking seams, and confirm downspouts discharge away from the foundation.
2. Eaves, Soffits, and Fascia: Look for peeling paint, soft wood, animal nests, and water stains—signs of overflow or trapped moisture that can lead to rot.
3. Valleys and Low Spots: Clear debris dams, check for granule piles, rusted valley metal, or displaced shingles/tiles, and verify water flows unobstructed.
4. Roof-to-Wall and Step Flashing: Inspect for loose or missing step flashing, cracked sealant, gaps behind siding, and missing kick-out flashing at terminations.
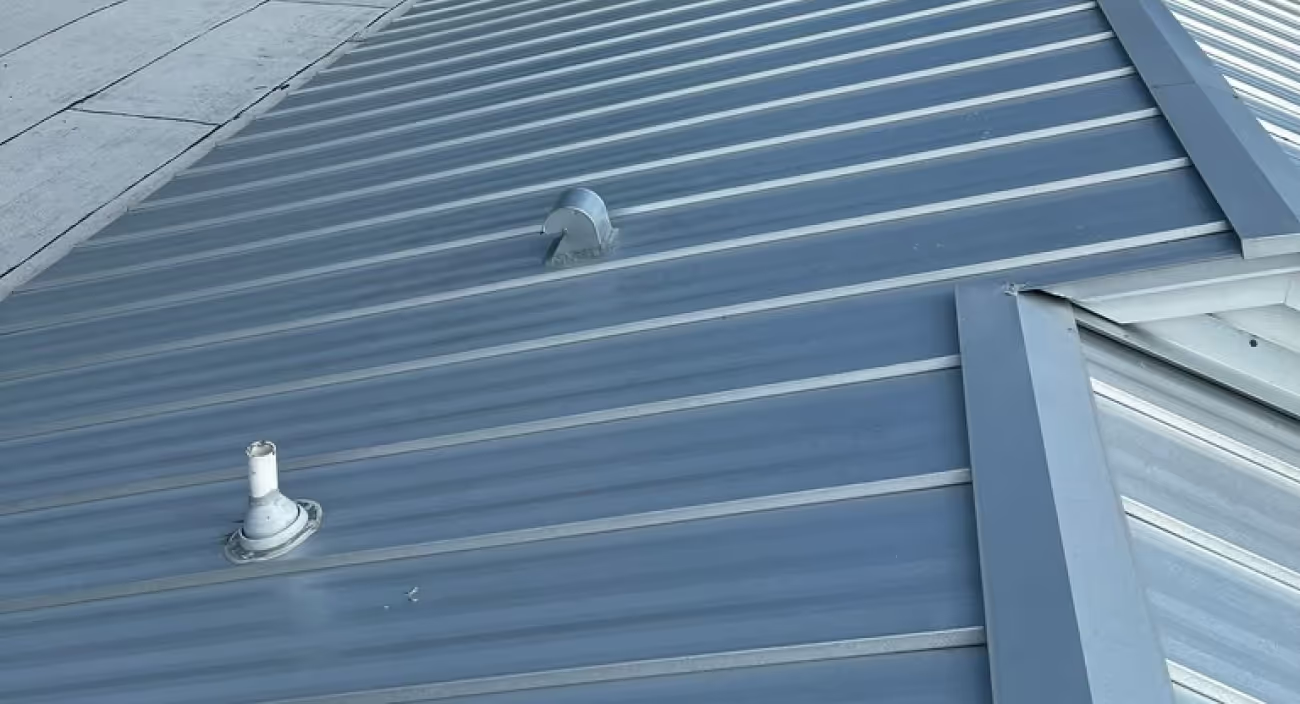
5. Pipe Boots, Vents, and Penetrations: Check rubber boots for cracks, metal collars for corrosion, loose storm caps, and brittle sealant; replace aging components.
6. Covering Condition (Shingle, Tile, Metal, or Flat): Spot lifted edges, slipped or cracked tiles, popped nails/screws, coating blisters, surface splits, or ponding on flat roofs.
7. Ridge, Hips, and Caps: Confirm ridge/hip caps are secure, ridge vents are clear, and sealant is intact; watch for wind creases along ridgelines.
8. Skylights, Solar, and Attachments: Inspect gaskets, curb flashing, and brackets; check fastener seals and look for hairline cracks in lenses or glazing.
9. Attic and Interior Clues: After rain, look for fresh stains, damp insulation, musty odors, or daylight at penetrations; verify ventilation paths and baffles are open.
10. Trees and Roof Perimeter: Maintain 6–10 feet of branch clearance, remove leaf traps at valleys and behind chimneys, and secure loose trim that can chafe roofing.
Photograph, Log, and Plan Next Steps
Create a simple maintenance log to track conditions, prove routine care, and support warranties.
- Capture date-stamped photos of each issue plus a wide shot for context
- Note exact location (slope/facet and distance from eave or ridge)
- Assign severity (monitor, repair soon, urgent) and owner (DIY vs. contractor)
- Record materials used and save receipts for warranty or insurance claims
- Schedule follow-ups after major storms and after each seasonal service
Maintenance Logging, Warranty Compliance, and Scheduling
Create a simple, repeatable system that captures what you inspected, what you cleaned or repaired, and what needs professional follow-up. Solid records protect warranties, streamline insurance claims, and keep seasonal tasks on schedule.
What to Document Each Check:
- Date, season, weather, and who performed the inspection
- Photos of each slope, valleys, penetrations, and roof-to-wall transitions
- Gutters/downspouts: debris noted, cleaned sections, and water flow test results
- Shingles/tiles: missing pieces, lifted tabs, nail pops, cracked tiles, and granule loss
- Flashings/sealants: step, counter, chimney, and pipe boots with any gaps or cracks
- Moss/algae: locations and square footage treated; products used per label
- Leak indicators: ceiling stains (size), musty odors, attic moisture readings if available
- Actions taken: fasteners resecured, sealant replaced, areas treated, and PPE used
- Next steps and target dates for rechecks or professional evaluation
Build a Recurring Calendar
- Spring: Full post-winter inspection; clean gutters; check flashings and sealants
- Summer: Look for UV damage, brittle sealants, algae growth; verify attic ventilation
- Fall: Heavy leaf gutter cleaning; clear valleys; pre-winter flashing and shingle checks
- Winter: Ground-based visual checks after storms; address ice dams safely or call a pro
Warranty and Insurance Safeguards:
- Follow manufacturer guidance (cleaners, moss control, and traffic limits) to keep coverage intact
- Avoid pressure washing; use approved soft-wash or manual removal methods
- Save receipts, product labels, before/after photos, and any maintenance logs
- Use licensed professionals for structural repairs, flashing replacement, or steep/complex roofs
- Mitigate active leaks promptly; delayed action can be considered neglect
Escalate Immediately If You Note:
- Widespread curling, cracked shingles/tiles, or pervasive granule loss
- Soft or spongy decking, sagging ridges, or moldy attic sheathing
- Detached, rusted, or misaligned flashings; gaps at chimneys or skylights
- Persistent leaks in the same area despite temporary fixes
- Storm damage: wind-lifted edges, hail bruising, punctures, or fallen limbs
Partnering for reliable results and lasting value means turning your notes into action. Talbot Companies can translate your maintenance log into a proactive service plan that extends roof life and reduces unexpected costs.
Post-Storm Triage: Fast Actions to Limit Damage
Severe rain, wind, or hail can turn small roof issues into costly leaks. Use this rapid-response checklist to protect interiors first, then stabilize the roof until a qualified pro can assess repairs.
First Hour: Safety, Containment, Documentation
Stay Off Wet Roofs: Avoid climbing ladders during active weather, at night, or when surfaces are slick. Prioritize personal safety over inspection.
Control Interior Water: Place buckets under drips, move furniture, cover valuables with plastic, and puncture bulging ceiling bubbles carefully to relieve trapped water into a container.
Document Everything: Photograph exterior, attic, and interior staining. Note time of storm, wind direction, and visible damage. Save receipts for tarps and supplies—mitigation is often reimbursable.
Temporary Protection Basics
Plastic Sheeting for Small Leaks: Tape 6–10 mil poly to the ceiling or around penetrations to redirect drips into containers until service arrives.
Tarping Do’s and Don’ts: Anchor tarps to solid framing above the leak area, extending past the ridge if possible. Use boards or sandbags—never fasten to gutters or through known electrical routes. If the roof is steep or two-story, call a professional.
Gutter Relief: If safe from the ground, clear downspout clogs with a hose to restore drainage and reduce overflow at eaves.
What to Inspect Once Conditions Are Safe
Shingles and Edges: Look for missing tabs, creases, uplifted corners, exposed fasteners, and debris at eaves, rakes, and ridges.
Flashings and Penetrations: Check chimneys, skylights, sidewall step flashing, vents, and pipe boots for gaps, lifted metal, and cracked seals.
Attic and Ceilings: Identify new stains, damp insulation, daylight through decking, and musty odors. Track each location for follow-up.
Call a Pro Immediately If You See
Impact or Structural Concerns: Fallen limbs, sagging decking, or displaced sheathing require urgent professional stabilization.
Multiple Active Leaks: Water entering from several areas, especially near electrical fixtures, demands expert mitigation.
Steep Slopes or Height Risks: Multi-story or complex roofs should be tarped and assessed by qualified crews for safety and durability.
Typical Emergency Costs and Timelines
Emergency Tarp Install: About $250–$750 for small, single-story areas; $800–$1,500+ for large spans or after-hours service.
Leak Diagnosis and Minor Repairs: Service calls commonly run $150–$450, with targeted fixes (pipe boots, small flashing/shingle repairs) ranging $300–$1,200.
Insurance Coordination: Keep photos, dates, and receipts for mitigation. Many policies expect prompt action to limit damage. Talbot Companies can assist with documentation and repair scopes—partnering for reliable results and lasting value.
Conclusion: Keep Your Roof in Shape with a Simple, Seasonal Plan
Routine roof care doesn’t need to be complicated. Stick to seasonal check-ins—spring and fall, plus after major storms—to catch small issues before they become leaks. Clear gutters and downspouts, look for missing or lifted shingles/tiles, inspect flashings at chimneys, skylights, and vents, remove debris and early moss growth, and watch for interior signs like ceiling stains or attic moisture. A disciplined checklist extends service life and helps avoid emergency repairs.
Talbot Companies can help you build a maintenance plan, perform safe, professional evaluations, and resolve issues early—partnering for reliable results and lasting value.
.svg)
.svg)
.avif)
.svg)

.avif)
.avif)

.avif)